Drawing is a form of expression that allows you to capture the world around you, and one subject that has fascinated artists for centuries is the mushroom. Mushrooms possess a unique and mysterious charm due to their organic shapes, varied textures, and natural aesthetic. Whether you’re a beginner artist or an experienced one, drawing mushrooms can offer an opportunity to explore intricate details, shading techniques, and the delicate beauty of nature.
In this guide, we will walk you through the entire process of drawing mushrooms, from understanding their basic structure to experimenting with advanced techniques and artistic styles. By the end of this article, you’ll be equipped with the knowledge to create realistic and imaginative mushroom drawings that stand out.
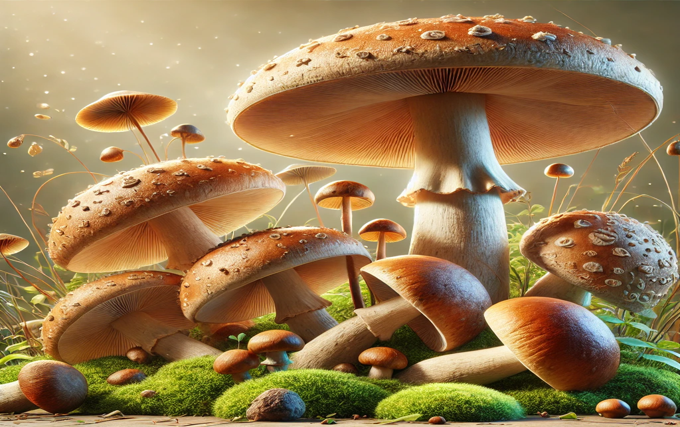
Understanding the Basic Structure of a Mushroom
Before we dive into specific techniques, it’s essential to understand the fundamental parts of a mushroom. This knowledge will give you a solid foundation when you begin sketching.
Anatomy of a Mushroom:
- Cap: The top part of the mushroom, which can vary in shape from flat to dome-like. It’s often what defines the mushroom species.
- Gills (or pores): The spore-producing structures found on the underside of the cap. They can appear as lines, pores, or ridges depending on the mushroom type.
- Stem (Stipe): The supporting structure that holds the cap above the ground. Stems can be thick, thin, long, or short depending on the species.
- Ring (Annulus): Some mushrooms have a ring on the stem where the cap was attached during growth.
- Volva: A cup-like structure at the base of the mushroom, seen in some species.
Knowing these components will help you focus on the details that make each mushroom unique, which is key to creating an accurate and realistic drawing.
Step-by-Step Guide to Drawing a Mushroom
Step 1: Start with the Cap
When you begin drawing a mushroom, it’s a good idea to start with the cap. The cap is usually the most noticeable feature, and its shape defines the overall look of the mushroom.
- Draw a Basic Outline: Sketch a simple oval or dome shape depending on the type of mushroom you want to draw. Don’t worry about getting it perfect; just create a loose outline.
- Define the Shape: Refine the cap by adding curvature and form. Some mushrooms have wavy edges or indentations. Make sure to study reference images to capture the right look.
- Add Texture: Many mushroom caps have unique textures such as spots, wrinkles, or scales. Lightly sketch these details onto the surface to give your drawing more dimension.
Step 2: Draw the Stem
Once you have the cap, it’s time to draw the stem or stipe. Stems come in different shapes and sizes, so observe your reference closely.
- Outline the Stem: Start by drawing two parallel lines extending from the center of the cap downward. The distance between the lines will determine the thickness of the stem.
- Shape and Form: Add a slight curve to the stem if needed, as most mushrooms aren’t perfectly straight. Some may have a bulbous base or taper toward the ground.
- Add Ring or Volva: If the mushroom has a ring or volva, add these elements now. The ring should sit near the top of the stem, while the volva will sit at the base.
Step 3: Draw the Gills or Underside Details
The underside of the mushroom cap often has gills, ridges, or pores, depending on the species. This is an important detail that can give your mushroom more realism.
- Draw the Gills: If your mushroom has gills, draw thin, evenly spaced lines radiating from the center of the cap to the outer edge. Pay attention to their spacing and how they curve slightly near the cap’s edge.
- Add Pores or Ridges: For mushrooms with pores (like a bolete), draw small dots or dashes on the underside. If the mushroom has ridges, sketch out thicker lines with small indents.
Step 4: Add Shading and Texture
Shading is crucial for bringing your mushroom to life. It adds depth, dimension, and realism to your drawing.
- Light Source: Determine where your light source is coming from. This will help you know where to add shadows and highlights.
- Shade the Cap: Start shading the cap by adding light shadows on one side and keeping the other side lighter to create a sense of depth. Use soft pencil strokes to mimic the smooth texture of most mushroom caps.
- Shade the Stem: The stem typically casts a shadow depending on the angle of the light source. Add shading to one side of the stem and near the base where it touches the ground.
- Texture Details: If your mushroom has bumps, scales, or spots, use your shading to make them pop. Darken the areas around these features to create contrast.
Step 5: Add Background or Environment (Optional)
If you want to place your mushroom in a natural setting, consider adding elements like grass, moss, or other forest details.
- Draw Ground Details: Lightly sketch the ground beneath the mushroom with small lines or dots to indicate grass or moss.
- Add Plants or Trees: If you want to include a larger environment, add distant trees or small plants around the mushroom. Keep these details simple so they don’t overshadow the main subject.
Different Styles for Drawing Mushrooms
Mushrooms offer a lot of artistic freedom due to their organic shapes. Here are a few styles you can experiment with to create unique drawings:
1. Realistic Style
For a realistic mushroom drawing, focus on capturing all the intricate details of the mushroom—its texture, shading, and structure. Use fine lines for the gills and a variety of shading techniques (hatching, cross-hatching, and blending) to achieve a three-dimensional effect.
2. Cartoon Style
If you prefer a more whimsical approach, try a cartoon style. Exaggerate certain features like the cap size or stem thickness, and use bold lines and flat colors. This style is playful and great for creating illustrations with personality.
3. Abstract or Fantasy Style
Mushrooms are often featured in fantasy art because of their mystical appearance. You can create an abstract mushroom drawing by experimenting with surreal shapes, bright colors, or imaginative backgrounds. Think about adding glowing effects or magical details like floating spores.
4. Ink and Pen Style
For an ink drawing, use fine liners or fountain pens to draw crisp outlines and details. Cross-hatching or stippling techniques can be used to add shading. This style is particularly effective for capturing the intricate details of mushrooms in black and white.
Tips for Drawing Mushrooms Successfully
- Study Reference Photos: Nature is diverse, and no two mushrooms are exactly alike. Using reference photos will help you understand the variations in shapes, textures, and colors.
- Experiment with Different Species: Try drawing different types of mushrooms, from button mushrooms to fly agaric. Each species offers something unique in terms of appearance and structure.
- Practice Shading Techniques: Shading is key to creating depth in your drawing. Practice different shading techniques like hatching, stippling, and blending to find what works best for you.
- Observe Texture: Mushrooms have a wide range of textures, from smooth and glossy to rough and scaly. Try to capture these details to make your drawing more realistic.
- Use Various Tools: Don’t limit yourself to pencils alone. Experiment with pens, markers, and even digital tools to see how they affect the final look of your mushroom drawings.
Common Mistakes to Avoid
- Ignoring the Light Source: Without a clear light source, your shading will look inconsistent. Always decide on the direction of light before you begin shading.
- Overcomplicating the Details: While details are important, adding too many can clutter your drawing. Focus on the most prominent features of the mushroom.
- Forgetting Proportion: Make sure the cap, stem, and gills are proportionate to one another. A cap that is too large or a stem that is too thin can make the drawing look unbalanced.
- Rushing the Sketch: Take your time with the initial sketch. Rushing this stage can lead to mistakes later in the drawing.
Conclusion
Drawing mushrooms is a rewarding exercise that allows you to explore organic shapes, textures, and shading techniques. Whether you’re aiming for a realistic depiction or a more stylized approach, the process will improve your overall drawing skills while deepening your appreciation for the natural world.
By understanding the basic anatomy of mushrooms, following step-by-step techniques, and experimenting with different styles, you’ll be able to create unique and compelling mushroom drawings that capture the essence of this fascinating subject. So grab your sketchbook and pencils, and start drawing your next masterpiece!


